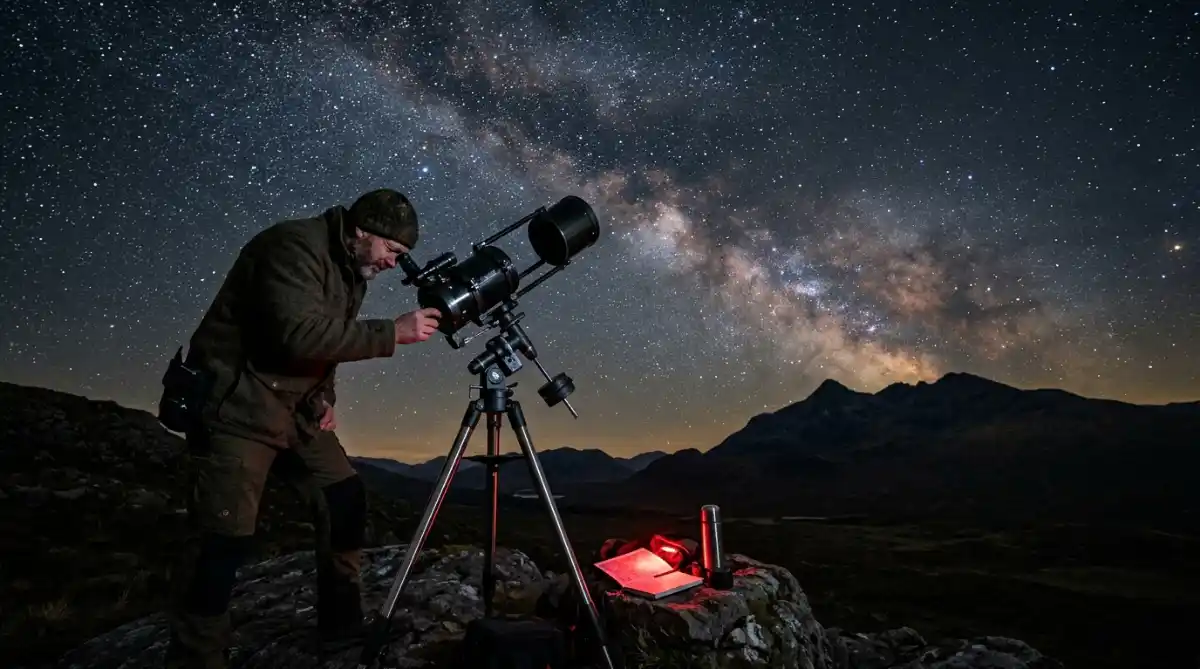
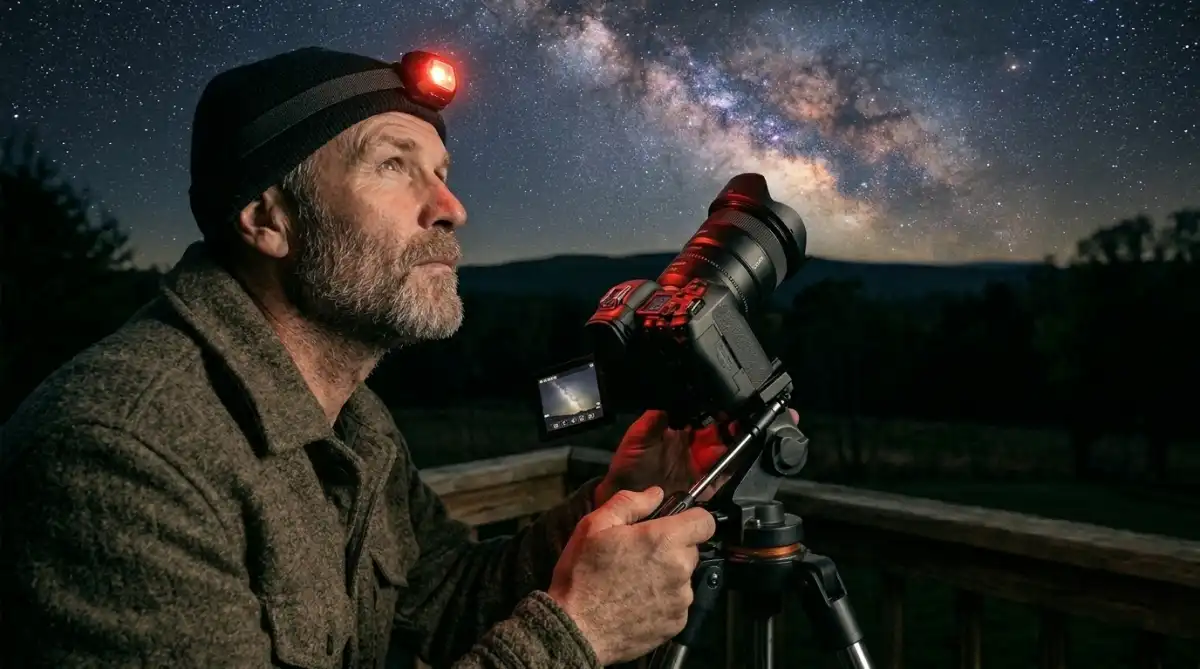
Category: Astrophotography

This category is a helpful resource for anyone interested in capturing the night sky, with guides on equipment, telescopes, cameras, settings, and techniques. Whether you are just starting out or looking to improve your results, you will find clear, practical content to help you photograph the universe.

  • Best Telescopes for Observing Planets and Galaxies for Beginners

    Best Telescopes for Observing Planets and Galaxies for Beginners

    Many first-time observers assume that viewing planets and galaxies requires expensive equipment. In reality, several beginner-friendly telescopes from internationally trusted brands offer excellent optical performance at reasonable prices. With the right telescope, beginners can clearly observe the Moon, Jupiterโ€™s moons, Saturnโ€™s rings, star clusters, and even nearby galaxies under dark skies.

    Here are some of the best affordable telescopes for beginners, selected for their ease of use, optical quality, and global availability. All models listed are well-known in the astronomy community and suitable for beginners worldwide.

    Telescope ModelBrandApertureMount TypeBest ForSkill Level
    Travel Scope 70Celestron70 mmAlt-AzimuthPortable stargazing, Moon & planetsBeginner
    AstroMaster 70AZCelestron70 mmAlt-AzimuthMoon and planetary viewingBeginner
    AstroMaster 130EQCelestron130 mmEquatorialPlanets, galaxies, deep-sky objectsBeginnerโ€“Intermediate
    Heritage 130PSky-Watcher130 mmTabletop DobsonianGalaxies, nebulae, star clustersBeginner
    StarBlast 4.5 AstroOrion114 mmTabletop DobsonianWide-field and deep-sky observingBeginner

    Celestron Travel Scope 70

    The Celestron Travel Scope 70 is designed for beginners who value portability and ease of use. Its lightweight design makes it ideal for outdoor and travel stargazing. Despite its compact size, it provides clear views of the Moon, planets, and bright star clusters.

    Best for: Casual stargazing and travel
    Strength: Easy setup and portability

    Celestron AstroMaster 70AZ

    This refractor telescope offers sharp lunar and planetary views with a stable alt-azimuth mount. It is well-suited for beginners who want straightforward operation without complex adjustments.

    Best for: Moon and planetary observation
    Strength: Stable mount and simple controls

    Celestron AstroMaster 130EQ

    With a larger 130 mm aperture, this reflector telescope gathers significantly more light, making it suitable for observing galaxies, nebulae, and star clusters. While the equatorial mount requires some learning, it offers smoother tracking once mastered.

    Best for: Beginners ready to explore deep-sky objects
    Strength: Bright images and improved detail

    Sky-Watcher Heritage 130P

    The Sky-Watcher Heritage 130P is a compact tabletop Dobsonian telescope widely praised for its optical performance. Its collapsible design makes it portable, while the 130 mm aperture delivers impressive views of galaxies and nebulae.

    Best for: Deep-sky observing under dark skies
    Strength: Excellent light-gathering capability

    Orion StarBlast 4.5 Astro Reflector

    This beginner-friendly Dobsonian telescope is known for its durability and ease of use. Its wide field of view makes it excellent for scanning star clusters and large deep-sky objects.

    Best for: Wide-field and deep-sky observing
    Strength: Simple design and robust construction

    Why Choosing the Right Telescope Matters for Beginners

    A beginnerโ€™s first telescope often determines whether astronomy becomes an enjoyable hobby or a frustrating experience. Telescopes that are too complex, unstable, or poorly built can discourage new users.

    Choosing the right beginner telescope offers several advantages:

    • Simple setup and operation
    • Clear and stable views of celestial objects
    • Low maintenance requirements
    • Balanced performance for planets and deep-sky objects

    Beginner telescopes should prioritize usability and optical quality over advanced features.

    How to Choose a Telescope for Beginners

    Aperture and Light Gathering

    The aperture is the diameter of the telescopeโ€™s main lens or mirror. Larger apertures collect more light, producing brighter and more detailed images. For beginners, telescopes with apertures between 70 mm and 130 mm provide an excellent balance between performance and portability.

    Telescope Type

    • Refractor telescopes are ideal for beginners due to their sharp planetary views and minimal maintenance.
    • Reflector telescopes offer brighter images for galaxies and nebulae but may require occasional alignment.

    Mount Type

    A stable mount is essential for comfortable viewing.

    • Alt-azimuth mounts are intuitive and beginner-friendly.
    • Equatorial mounts allow more precise tracking but have a steeper learning curve.

    Portability

    Lightweight and compact telescopes are easier to transport, especially for beginners who observe from multiple locations.

    Tips for Beginners Starting Stargazing

    • Start with the Moon and bright planets
    • Use astronomy apps or star charts to locate objects
    • Observe from dark locations away from city lights
    • Allow your eyes time to adapt to darkness
    • Handle optics carefully and store your telescope properly

    Frequently Asked Questions

    What is the best telescope for beginners?

    A beginner telescope should be easy to use, stable, and have good optical quality. Refractors and small reflectors from trusted brands are ideal starting points.

    Can beginners see galaxies with affordable telescopes?

    Yes. Under dark skies, brighter galaxies like Andromeda can be observed with mid-range beginner telescopes, though fine details may be limited.

    Is a larger aperture always better?

    Larger apertures provide brighter views, but they also increase size and weight. Beginners should balance aperture with ease of use.

    Do beginners need expensive accessories?

    No. Most beginner telescopes include essential eyepieces. Additional accessories can be added later as experience grows.

  • Astrophotography for Beginners: Everything You Need to Get Started

    Astrophotography for Beginners: Everything You Need to Get Started

    Astrophotography is one of the most rewarding things you can do with a clear night sky. It is also, at first glance, one of the most intimidating.

    Long exposures, tracking mounts, image stacking, noise reduction. The vocabulary alone can make you feel like you’ve wandered into the wrong hobby. But the truth is that astrophotography has never been more accessible than it is right now. Smartphone sensors are capturing the Milky Way.

    Entry-level DSLR cameras are imaging nebulae from suburban backyards. And the global community of amateur astronomers is bigger, friendlier, and better-documented than at any point in history.

    This guide will walk you through everything: what astrophotography actually is; its history; career opportunities, average salary, and who hires astrophotographers; the different types you can pursue; the gear you genuinely need (and what you can skip); the camera settings that matter; how to find and plan your shots; and how to process your images once they’re on your computer. By the end, you’ll have a clear, actionable path to your first image of the night sky.

    What is astrophotography?

    Astrophotography is the art and science of taking images of celestial objects and events. It can be pursued as a hobby or a profession. Modern technology has made high-quality astrophotos more accessible, encouraging more people to try the field. The practice began in the 19th century, when early astronomers attempted to photograph the Moon and star clusters.

    Watch this video before you get into astrophotography:

    History and development

    Notable early contributors to astrophotography include William Herschel and his son John Frederick William Herschel, who photographed the Moon and star clusters. Since then, the field has advanced to capture objects invisible to the naked eye, such as distant galaxies, nebulae, and short-lived events like supernovae. It combines technical skill, artistic vision, and scientific application.

    Career opportunities in astrophotography

    Scientific research

    Astrophotographers can work with astronomers to document celestial objects and changes in the night sky. Their images may support data analysis, research, and scientific publications. In education, astrophotographers create visuals for classrooms, lectures, and outreach programs. Competitions such as the Astronomy Photographer of the Year offer recognition and exposure.

    Night sky tourism

    Growing interest in dark-sky travel has created demand for astrophotography services. Photographers can guide tours, teach workshops, and offer photo sessions at locations with minimal light pollution. These services can enhance the visitor experience and generate income for skilled photographers.

    Publishing and media

    Magazines, websites, books, and documentaries require high-quality astronomical images. Astrophotographers may provide visuals for articles, covers, or video productions. Their work is used to illustrate scientific concepts or to add visual appeal to media content.

    Stock photography and licensing

    Astrophotographers can sell their work through stock image platforms, where photos may be licensed for advertising, websites, or promotional materials. This provides a potential source of ongoing income from previously captured images.

    It is a money-making venture. This implies that the taken photographs can still be used for other purposes, like in advertisements, on websites, or for promotional purposes.

    How much money does an astrophotographer make?

    According to Jobzmall, beginner-level astrophotographers earn between $25,000 and $50,000 per year, while experienced professionals can make up to $75,000 per year. Pay depends on skill, experience, and the type of work.

    Who hires astrophotographers?

    Employers include research institutions, universities, space agencies such as NASA, ISRO, and ESA, observatories, planetariums, media companies, and tourism businesses. Work may involve research projects, public outreach, or commercial assignments.

    Types of Astrophotography

    Before buying any gear, it helps to know what kind of astrophotography you actually want to do. Each branch has different requirements in terms of equipment, location, and skill level.

    Wide-Field Nightscape Photography

    This is where almost every beginner should start. Wide-field nightscape photography means photographing large portions of the night sky (the Milky Way rising over a mountain, star trails above a desert landscape, a meteor shower streaking across the sky) with a standard camera and a wide-angle lens.

    What you need: A DSLR or mirrorless camera, a wide-angle lens (14โ€“35mm), and a sturdy tripod. That’s it.

    What you can photograph: The Milky Way core, star trails, constellations, conjunctions (planets close together in the sky), auroras, meteors, satellites.

    Difficulty: Low. This is the best starting point for anyone new to astrophotography.

    Lunar Photography

    Photographing the Moon is actually one of the most technically forgiving branches of astrophotography, because the Moon is so bright that you don’t need long exposures or tracking equipment.

    What you need: Any camera with a zoom lens of at least 200mm, or a camera attached to a small telescope.

    What you can photograph: Surface details including craters, mountain ranges, valleys, and the terminator line (the boundary between the lit and dark portions of the Moon).

    Difficulty: Very low. A great first target for absolute beginners.

    Planetary Photography

    Photographing the planets: Jupiter, Saturn, Mars, Venus, requires high magnification and a different technique than wide-field or deep-sky imaging. Rather than a single long exposure, planetary photographers typically record video at high frame rates and then stack the best frames together in software.

    What you need: A telescope with a long focal length (at least 1000mm), and ideally a dedicated planetary camera or a smartphone adapter. A stable mount is essential.
    What you can photograph: Jupiter’s cloud bands and the Great Red Spot, Saturn’s rings, Mars’s polar ice caps, Venus’s phases.

    Difficulty: Moderate. Requires more equipment than nightscape photography but less than deep-sky imaging.

    Deep-Sky Object (DSO) Imaging

    Deep-sky imaging is the most technically demanding branch of astrophotography, and also arguably the most spectacular. DSO imaging captures nebulae, galaxies, star clusters, and supernova remnants (objects that are often thousands or millions of light-years away and extremely faint).

    What you need: A camera (DSLR, mirrorless, or dedicated astronomy camera), a telescope, and a motorized equatorial mount to track the sky as the Earth rotates. Capturing multiple exposures and stacking them in software is standard practice.

    What you can photograph: The Orion Nebula (M42), the Andromeda Galaxy (M31), the Crab Nebula (M1), globular clusters, emission nebulae, planetary nebulae.

    Difficulty: High. Best approached after gaining experience with wide-field imaging first.

    What Equipment Do You Actually Need?

    The single biggest misconception about astrophotography is that you need expensive, specialized gear to get started. You don’t. Here is a realistic, honest breakdown of equipment at each stage.

    Stage 1: The Absolute Minimum (Smartphone or Any Camera + Tripod)

    Modern smartphones (particularly recent flagship Android phones and iPhones) can capture the Milky Way using their built-in night modes. Apps like ProCamera, Halide (iOS), or Camera2 (Android) give you manual control over ISO, shutter speed, and focus, allowing you to push your phone much further than the default camera app permits.

    If you have a smartphone and a tripod adapter (around โ‚น500โ€“โ‚น2,000 or $10โ€“$30 depending on where you are), you already have a working astrophotography setup. The results won’t rival a DSLR, but they’re real, and they’re a genuinely useful way to learn composition and planning before investing more.

    Stage 2: The Core Beginner Setup (DSLR or Mirrorless + Wide Lens + Tripod)

    This is the setup recommended for the vast majority of beginners, and it’s what will produce satisfying Milky Way and star trail images without requiring a tracking mount.

    Camera body: Any entry-level DSLR or mirrorless camera with manual mode and RAW file capability will work. Specific models worth considering include:

    • Canon EOS 250D / Rebel SL3: compact, beginner-friendly, good high-ISO performance
    • Nikon D3500 / D5600: excellent dynamic range, large second-hand market
    • Sony A6000 series: mirrorless, lighter, excellent sensor performance
    • Fujifilm X-T30: strong high-ISO capability, compact form factor

    The sensor size matters. A full-frame sensor (found in more expensive bodies) collects more light than a crop sensor (APS-C) or micro four-thirds, but an APS-C sensor is more than capable for beginners.

    Lens

    For wide-field nightscape photography, you want a wide-angle lens with a large maximum aperture. The two most recommended beginner astrophotography lenses are:

    • Rokinon/Samyang 14mm f/2.8: manual focus, affordable, produces excellent results for its price
    • Canon 10โ€“18mm f/4.5โ€“5.6 / Nikon 10โ€“20mm f/4.5โ€“5.6: versatile zoom options, though the smaller maximum aperture requires longer exposures.

    A lens at f/2.8 or wider lets in significantly more light than an f/4 lens, which is critical for photographing faint objects without excessively long exposures.

    Tripod

    Don’t underestimate the tripod. A flimsy tripod is one of the most common sources of blurry astrophotos. Choose one that feels solid with your camera mounted on it, with minimal wobble when you press the shutter button. A ball head allows easy precise positioning. Ball head tripods from brands like Joby, Benro, or K&F Concept offer good stability at reasonable prices.

    Remote shutter release or intervalometer: Pressing the shutter button directly causes camera shake, particularly for exposures longer than a second. A remote shutter release (wired or wireless) eliminates this. An intervalometer additionally lets you automatically take multiple frames for star trails or image stacking.

    Stage 3: Adding a Tracker (For Better Stars and Longer Exposures)

    The Earth rotates at a rate of approximately 15 arcseconds per second. On a stationary tripod, stars begin to trail (appear as short lines rather than points) after exposures of roughly 15โ€“25 seconds depending on your focal length. A tracking mount counteracts this rotation by turning at the same rate as the Earth, keeping stars pinned to the same pixels on your sensor.

    Star tracker mounts are compact, battery-powered devices that sit between your tripod head and camera. Popular models include:

    • iOptron SkyTracker Pro: reliable, portable, accurate polar alignment
    • Sky-Watcher Star Adventurer Mini: lightweight (under 500g), affordable, excellent for travel
    • Vixen Polarie Star Tracker: compact and accurate, popular with landscape astrophotographers

    With a tracker, you can extend your exposures to several minutes, dramatically improving your ability to capture faint structures in nebulae and galaxies with just a wide-angle or short telephoto lens.

    What You Can Skip (For Now)

    • A telescope (not necessary for nightscape and Milky Way photography)
    • A dedicated astronomy camera (your DSLR works well for beginners)
    • Narrowband filters (highly specialized, for advanced imaging)
    • An equatorial mount with a telescope (save this for deep-sky imaging later)

    Understanding the Key Camera Settings

    Astrophotography relies on three camera settings more than any others: ISO, aperture, and shutter speed. These form the exposure triangle. The relationship between them determines how much light hits your sensor and how your image looks.

    ISO

    ISO is your camera’s light sensitivity setting. A higher ISO means the sensor is more sensitive to light, allowing it to capture faint objects in a shorter time. However, higher ISO also introduces digital noise, random variations in pixel brightness that make images appear grainy.

    For nightscape photography, ISOs between 1600 and 6400 are typical. The right ISO depends on your camera’s sensor quality and your shooting conditions:

    A newer full-frame sensor (Sony A7III, Nikon Z6, etc.) handles ISO 6400 with manageable noise

    An APS-C sensor from 5โ€“10 years ago may show significant noise above ISO 3200

    Light-polluted skies require lower ISOs because the sky itself is bright, worsening noise

    A useful approach: take a test shot at ISO 3200 and ISO 6400, zoom into the image on your camera’s screen, and judge the noise level yourself. Your camera’s native base ISO (typically ISO 100 or 200) produces the cleanest images, but is too insensitive for most nighttime shooting.

    Aperture

    Aperture refers to the size of the opening in your lens that lets light through. It’s expressed as an f-number: f/1.8, f/2, f/2.8, f/4, f/5.6, where lower numbers mean a larger opening and therefore more light.

    For nightscape photography, always shoot at the widest aperture your lens allows. An f/1.8 lens collects four times as much light as an f/3.6 lens. This translates directly into either brighter images or shorter exposure times, both of which reduce star trailing and noise.

    The caveat: many lenses produce slightly soft or distorted images at their maximum aperture, particularly in the corners. Stopping down by one stop (e.g., shooting f/2.0 on an f/1.8 lens) often improves sharpness noticeably. Test your lens and find the sweet spot.

    Shutter Speed

    Shutter speed determines how long the camera’s sensor is exposed to light. Longer shutter speeds collect more light but risk star trailing on a fixed tripod, and risk overexposing the sky in light-polluted locations.

    The relationship between shutter speed and star trailing depends on your focal length and sensor size. This is where the 500 Rule comes in.

    The 500 Rule (and Why It Matters)

    The 500 Rule is the standard starting point for calculating your maximum shutter speed before stars begin to trail on a stationary tripod. The formula is:
    Maximum shutter speed (seconds) = 500 รท (focal length in mm ร— crop factor)
    Examples:

    Full-frame camera + 24mm lens: 500 รท 24 = ~20 seconds

    APS-C camera (1.5ร— crop) + 24mm lens: 500 รท (24 ร— 1.5) = 500 รท 36 = ~13 seconds

    APS-C camera + 14mm lens: 500 รท (14 ร— 1.5) = 500 รท 21 = ~23 seconds

    The 500 Rule gives you a safe starting point. In practice, modern high-megapixel cameras may require shorter exposures because the pixel density makes trailing more visible when zoomed in. A stricter version called the NPF Rule accounts for pixel size and declination angle, and is worth looking up once you’re comfortable with the basics.

    The key takeaway: use the widest lens you have, keep your shutter speed within the 500 Rule limit, and dial up ISO to compensate for the shorter exposure time.

    How to Choose a Shooting Location

    Your location will make or break your astrophotography session. Three factors matter above all others: darkness, weather, and horizon.

    Light Pollution

    The artificial glow from cities, streetlights, and industrial areas โ€” is the primary challenge for astrophotographers. It brightens the sky background, drowning out faint stars and making it difficult or impossible to see the Milky Way.

    The Bortle Scale measures sky darkness from 1 (perfectly dark rural sky) to 9 (inner-city sky where only the brightest stars are visible). For Milky Way photography, you ideally want a Bortle Class 4 or darker sky. For wide-field star photography without the Milky Way, even a Class 5โ€“6 sky produces decent results.

    Use Light Pollution Map (lightpollutionmap.info) or the Globe at Night project to find dark sky areas near you. In India, dark sky zones exist in places like Spiti Valley (Himachal Pradesh), Hanle (Ladakh), Pench National Park (Madhya Pradesh), and the Thar Desert (Rajasthan). Many rural areas across India that lack major infrastructure provide surprisingly dark skies.

    Atmospheric Conditions

    Even a dark sky is useless under cloud cover or haze. For India specifically, the monsoon season (Juneโ€“September) makes consistent astrophotography difficult across most of the country. The best months for astrophotography in India are typically October through February, when clear, transparent nights are most frequent.
    Two atmospheric quality metrics matter:

    Transparency: how clear the air is. High transparency means less scattering of starlight.
    Seeing: how stable the atmosphere is. Good seeing means sharper stars. Bad seeing produces shimmering, blurry stars.

    Apps like Clear Outside and Astrosphere give forecasts for both transparency and seeing, going beyond standard weather apps.

    Horizon Clearance

    If your goal is to photograph the Milky Way galactic core, you need a clear southern horizon in the Northern Hemisphere. Trees, mountains, or buildings blocking the south will obscure the most dramatic part of the Milky Way for most of the year. Scout your location before your actual shooting session.

    Planning Your Astrophotography Session

    Arriving at a dark location without a plan wastes time and often results in nothing. Good planning turns a clear night into productive shooting.

    Check the Moon Phase

    The Moon is the astrophotographer’s most significant natural obstacle. A full moon is bright enough to wash out the Milky Way entirely and significantly degrade wide-field exposures. Shoot during the new moon or within a few days of it for the best conditions. If the Moon is above the horizon, plan your shots facing away from it.

    Use the Wonders in Space Full Moon Calendar or apps like Stellarium to check moonrise and moonset times for your planned shooting night.

    Use Planetarium Apps

    Stellarium (free, desktop and mobile), SkySafari, and PhotoPills are essential tools for planning exactly where the Milky Way will be at a given time and location. These apps let you simulate the night sky at any date, time, and GPS coordinate, so you can plan your composition in advance.

    PhotoPills in particular is designed for photographers: it overlays the Milky Way, Moon, and Sun position on your device’s camera view through augmented reality, letting you preview exactly where the galactic core will rise and set relative to your landscape.

    Consider the Season

    The Milky Way galactic core is only visible from Earth during certain months. From India and most of the Northern Hemisphere, the core is best positioned in the sky from approximately March through October, peaking in June and July. During the winter months, the galactic core is below the horizon at night, meaning winter astrophotography focuses more on star clusters, nebulae, and other targets.

    How to Focus on Stars

    Autofocus does not work in the dark. A camera pointed at a dark sky has nothing to lock onto, and autofocus systems will hunt endlessly without finding a focus point. You must focus manually.

    Here is the most reliable method for beginners:

    • Point your camera at a bright star or a distant artificial light on the horizon
    • Set your lens to manual focus mode
    • Enable Live View on your camera screen (or use the electronic viewfinder on a mirrorless camera)
    • Zoom in on the bright star using your camera’s digital zoom (usually a button on the back)
    • Slowly turn the focus ring until the star appears as a tiny, sharp pinpoint rather than a soft, blurry blob
    • Lock the focus ring in place with tape if it tends to shift

    On many lenses, infinity focus (the โˆž symbol on the focus ring) is a useful starting point, but on modern lenses, true optical infinity often falls slightly before the hard stop, so don’t rely on it alone. Use the Live View zoom method above to verify sharpness.

    Capturing Your First Image: Step-by-Step

    With location chosen, focus confirmed, and settings prepared, here’s a practical step-by-step for your first astrophotography session.

    Before leaving home:

    1. Fully charge your camera battery (cold temperatures drain batteries faster; bring a spare)
    2. Format your memory card and confirm you have enough space (RAW files are large)
    3. Download Stellarium or PhotoPills and plan your composition
    4. Pack red light headlamp: red light preserves your night vision, which takes about 20 minutes to fully adapt

    At your location:

    1. Set up your tripod on stable ground, away from foot traffic
    2. Attach your camera and level the tripod head
    3. Set your lens to its widest aperture
    4. Set your camera to RAW file format (not JPEG, RAW files retain far more data for processing)
    5. Set your camera to Manual (M) mode
    6. Set your ISO to 3200 as a starting point
    7. Set your shutter speed using the 500 Rule based on your focal length
    8. Turn off image stabilization: on a tripod, stabilization can cause blur by trying to compensate for non-existent movement
    9. Turn off long exposure noise reduction initially: it doubles your exposure time, blocking further shooting while the camera processes
    10. Use a 2-second self-timer or a remote shutter release to avoid camera shake when triggering the shutter
    11. Take a test shot and review it on your camera screen
      Check star sharpness by zooming into the image (stars should be pinpoints, not trails or blurry blobs)
    12. Adjust ISO, shutter speed, or framing as needed

    Once settings are dialed in, shoot a series of 20-30 frames for later stacking, or shoot a longer sequence for star trails.

    Image Processing: From Raw Files to Final Photo

    The photograph that comes off your camera sensor is a raw data file it contains all the captured information but looks flat, dim, and noisy. Processing is where the image comes to life.
    Essential Software

    For beginners:

    • Adobe Lightroom: the most widely used tool for adjusting brightness, color, noise reduction, and contrast on individual frames. Available as a subscription or as Lightroom Classic.
    • RawTherapee: a free, open-source alternative to Lightroom with extensive RAW processing capabilities.
    • GIMP: free image editing that can handle basic astrophotography adjustments.

    For image stacking (combining multiple frames):

    • DeepSkyStacker (DSS): free, Windows-only, the standard tool for deep-sky image stacking. Combines multiple exposures to reduce noise and reveal faint detail.
    • Sequator: free, Windows-only, designed specifically for wide-field nightscape stacking including landscapes.
    • Siril: free, cross-platform (Windows/Mac/Linux), increasingly the preferred choice for beginners stepping into deep-sky processing.

    A Basic Processing Workflow for Nightscape Images

    The goal of processing is to bring out the faint sky detail while reducing noise and keeping the image looking natural (or dramatic, depending on your style).

    1. Import your RAW files into Lightroom or RawTherapee
    2. Adjust white balance: artificial light pollution often creates orange-yellow color casts. Shift the white balance cooler (more blue) to produce a more natural dark sky appearance.
    3. Raise the shadows and reduce the highlights: this reveals faint sky detail without blowing out bright stars.
    4. Apply noise reduction: Lightroom’s Luminance slider (or the AI Denoise tool in newer versions) is remarkably effective. Start at 40โ€“60 and judge the result.
    5. Boost clarity and texture: this brings out the structural detail in the Milky Way’s dust lanes and star clouds.
    6. Adjust the curve: a gentle S-curve increases overall contrast and gives the image more punch.
      Export at full resolution as TIFF or JPEG

    Understanding Image Stacking

    Image stacking is the process of combining multiple exposures of the same scene so that random noise averages out and consistent signal (actual light from stars and nebulae) is reinforced. A stack of 20 frames of the Milky Way will show dramatically less noise and more detail than any single frame at the same settings.

    This is why astrophotographers often take long sequences rather than single shots. Load your frames into DeepSkyStacker or Sequator, align them (the software does this automatically), and let it combine them. The resulting stacked image is your master frame for final processing.

    Common Beginner Mistakes and How to Avoid Them

    Choosing a full moon night to shoot the Milky Way

    The Moon washes out the Milky Way completely. Always check the moon phase before planning a session. Shoot within a few days of new moon.

    Shooting in JPEG instead of RAW

    JPEG files are compressed and lose information during processing. RAW files preserve all the data your sensor captured, giving you far more flexibility in processing. Always shoot RAW for astrophotography.

    Not letting your eyes (and camera) adapt to the dark

    Your eyes take about 20โ€“30 minutes to fully adapt to darkness. Don’t check your phone screen (or use white-light flashlights) during this time. Switching to airplane mode and using a red-light headlamp helps.

    Touching the tripod during exposures

    Even a light touch on the tripod during a 20-second exposure will blur the image. Use a remote shutter release or the 2-second self-timer on every shot.

    Shooting on hazy or dewy nights

    Dew forming on your lens is invisible until you see blurry, glowing stars in your images. A dew heater strip (available cheaply) wraps around your lens and prevents this. Check your lens between shots on humid nights.

    Using image stabilization on a tripod

    Optical image stabilization can cause blur when used on a stationary tripod because the system tries to compensate for movement that isn’t there. Turn it off.

    Not checking star sharpness until you get home

    Always zoom into your test shots on the camera screen to verify that stars are sharp pinpoints, not blurry or trailed. Catching a focus problem in the first five minutes of a session saves the entire night.

    How to Progress from Beginner to Intermediate

    Once you’ve taken your first Milky Way shots and worked through the basics, the natural next steps are:

    Add a star tracker

    A Sky-Watcher Star Adventurer Mini or iOptron SkyTracker Pro opens up longer exposures and enables you to image fainter structures in the Milky Way with your existing camera and lens.

    Move to a short telephoto lens. A 50mm, 85mm, or 135mm lens attached to a tracker lets you zoom into specific sections of the sky: nebula regions, star clusters, areas of the Milky Way with impressive results before you ever touch a telescope.

    Learn narrowband imaging

    Light pollution filters (such as SkyTech or Optolong L-eNhance filters) allow you to photograph nebulae from light-polluted suburban skies by blocking artificial light wavelengths while passing the specific wavelengths emitted by nebulae. A single filter can transform your backyard imaging dramatically.

    Try planetary imaging during opposition

    When Jupiter or Saturn are at opposition (closest to Earth), a smartphone attached to a basic telescope eyepiece using an afocal adapter can produce surprisingly good planetary images. This is an excellent, low-cost way to try telescope-based astrophotography.

    Join the community. India has a growing community of amateur astrophotographers. The Amateur Astronomers Association of India, Astro Trails India, and various online forums connect you with people who can answer questions, share dark sky locations, and provide feedback on your images.

  • A Telescope guide for beginners; Types, Mounts and more

    A Telescope guide for beginners; Types, Mounts and more

    Looking at the stars is always exciting. Telescopes are like doors into other galaxies, stars, and planets, thus making it easier to observe the universe properly. Proper telescope choice is another important aspect of stargazing.

    Types of telescopes

    Refracting telescopes

    Image showing the working of keplarian refracting telscope. A telescope guide for beginners
    Keplarian Refracting Telescope. Image credit: Wikimedia Commons

    Refracting telescopes provide clear and crisp views of heavenly bodies through their lens-based optics. Think about how pleased Galileo was the first time he pointed a telescope at the night sky. They are the most appropriate for people who are starting in astronomy; they are simple to operate and do not require regular maintenance.

    Reflecting telescopes

    Image showing working of a reflecting telescope.
    A Reflecting Telescope. Image credit: Wikimedia Commons

    Reflecting telescopes are based on mirrors for image creation, and their construction allows them to have bigger apertures, which in turn helps capture more light and display dimmer objects; hence, it is like advancing from using small to larger cosmic lenses that reveal all secrets about the universe.

    Know how the telescopes work:

    Catadioptric telescopes

    A catadiaoptric Maksutov telescope.
    A 150 mm aperture catadioptric Maksutov telescope. Image credit: Wikimedia Commons

    Having lenses and mirrors, catadioptric telescopes are tailored for versatility, thus giving a small yet heavyweight package. When it comes to optical observation and astrophotography, telescopes such as the renowned Schmidt-Cassegrain design stand out like none other.

    A telescope that is capable of multitasking and that can be altered in line with the conditions is beneficial.

    Factors to consider while buying a telescope

    Aperture and light gathering

    At any given time, the amount of light a telescope collects is determined by its aperture. The image of an object that is too faint can be increased in brightness using a large piece of equipment. Simply put, an aperture is just like having a big eye that is used to watch the dimmest cosmic bodies.

    The smaller oneโ€™s field of view, the more opportunities one has to see more details within it.

    Focal length and magnification

    If you know the relationship between focal length and magnification, you can identify a cosmic sweet spot. In other words, when studying these celestial objects, our vision should just be right within a range that is not too narrow or too wide.

    Telescope mount types

    A telescope on an Altazimuth mount on lush green grass.
    Altazimuth mount. Image credit: Wikimedia Commons

    The most important thing to consider is the stability of your telescope. The Altazimuth mount usually follows the Earthโ€™s pole, which makes it capable of being used in shooting images that would require a long time. It normally offers the advantage of simplicity over the equatorial when it comes to viewing images through an eyepiece.

    What we mean is that this is just as important as choosing the appropriate mode of transport because in both scenarios stabilization ensures comfort.

    How to maintain a telescope?

    A delicate touch is important when it comes to cleaning and maintaining a telescope’s optics. Dust can be removed without causing scratches by using a soft brush and breathing gently. It is the regular maintenance of your telescope that will guarantee that it remains performing at its best as it goes through the cosmos.

    Keeping telescopes safe from environmental hazards during storage and transportation is very important. Buy strong carrying bags as well as protective covers for your stargazing partner.

    Budget considerations

    If you are an amateur astronomer or someone interested in taking up astrophotography as a hobby, then rest assured because there are many affordable telescopes.

    For instance, there is Celestronโ€™s AstroMaster series, which starts at just under $200, while the Orion SkyScanner series, though marketed at about $199.99+, is still cost-effective, allowing one to start studying stars right from Earth.

    Recommended telescopes

    5 best telescopes for astrophotography

    1. Meade LX200 Series
    2. Sky-Watcher Evostar Pro Series
    3. Celestron EdgeHD Series
    4. Orion Astrograph Refractors
    5. William Optics RedCat Series

    5 best beginner-friendly astronomy telescopes

    1. Celestron NexStar 130SLT
    2. Celestron PowerSeeker 127EQ
    3. Orion SkyQuest XT8
    4. Meade Instruments Infinity 102mm AZ
    5. Sky-Watcher Heritage 130P

    You can also read Best Telescopes for Observing Planets and Galaxiesย for a much more detailed guide.